Tired of your Facebook pictures not looking as good as they should?
So you took this amazing picture of your little cutie, or they just had professional pictures taken, and you just can’t wait to post them to Facebook for all your friends and family to see! You upload the pictures and realize they don’t quite look as good as they did originally. That is because Facebook compressed your photos during upload. Gasp! Now they don’t look as sharp, or maybe they even look a bit distorted. What can be done?
It’s just a quick change to your photo settings on Facebook to HD, and your pictures will upload in all their glory. Well, sort of: Facebook will always compress images, but they will look a ton better! Who doesn’t want their pictures looking the best they can?
Years from now, when your memories pop up, you want beautiful pictures, not grainy, noisy, compressed images. (Trust me, some of mine come up from years ago, when camera phones were not all that great, and they are cringe worthy!) Here are the steps to fix this issue:
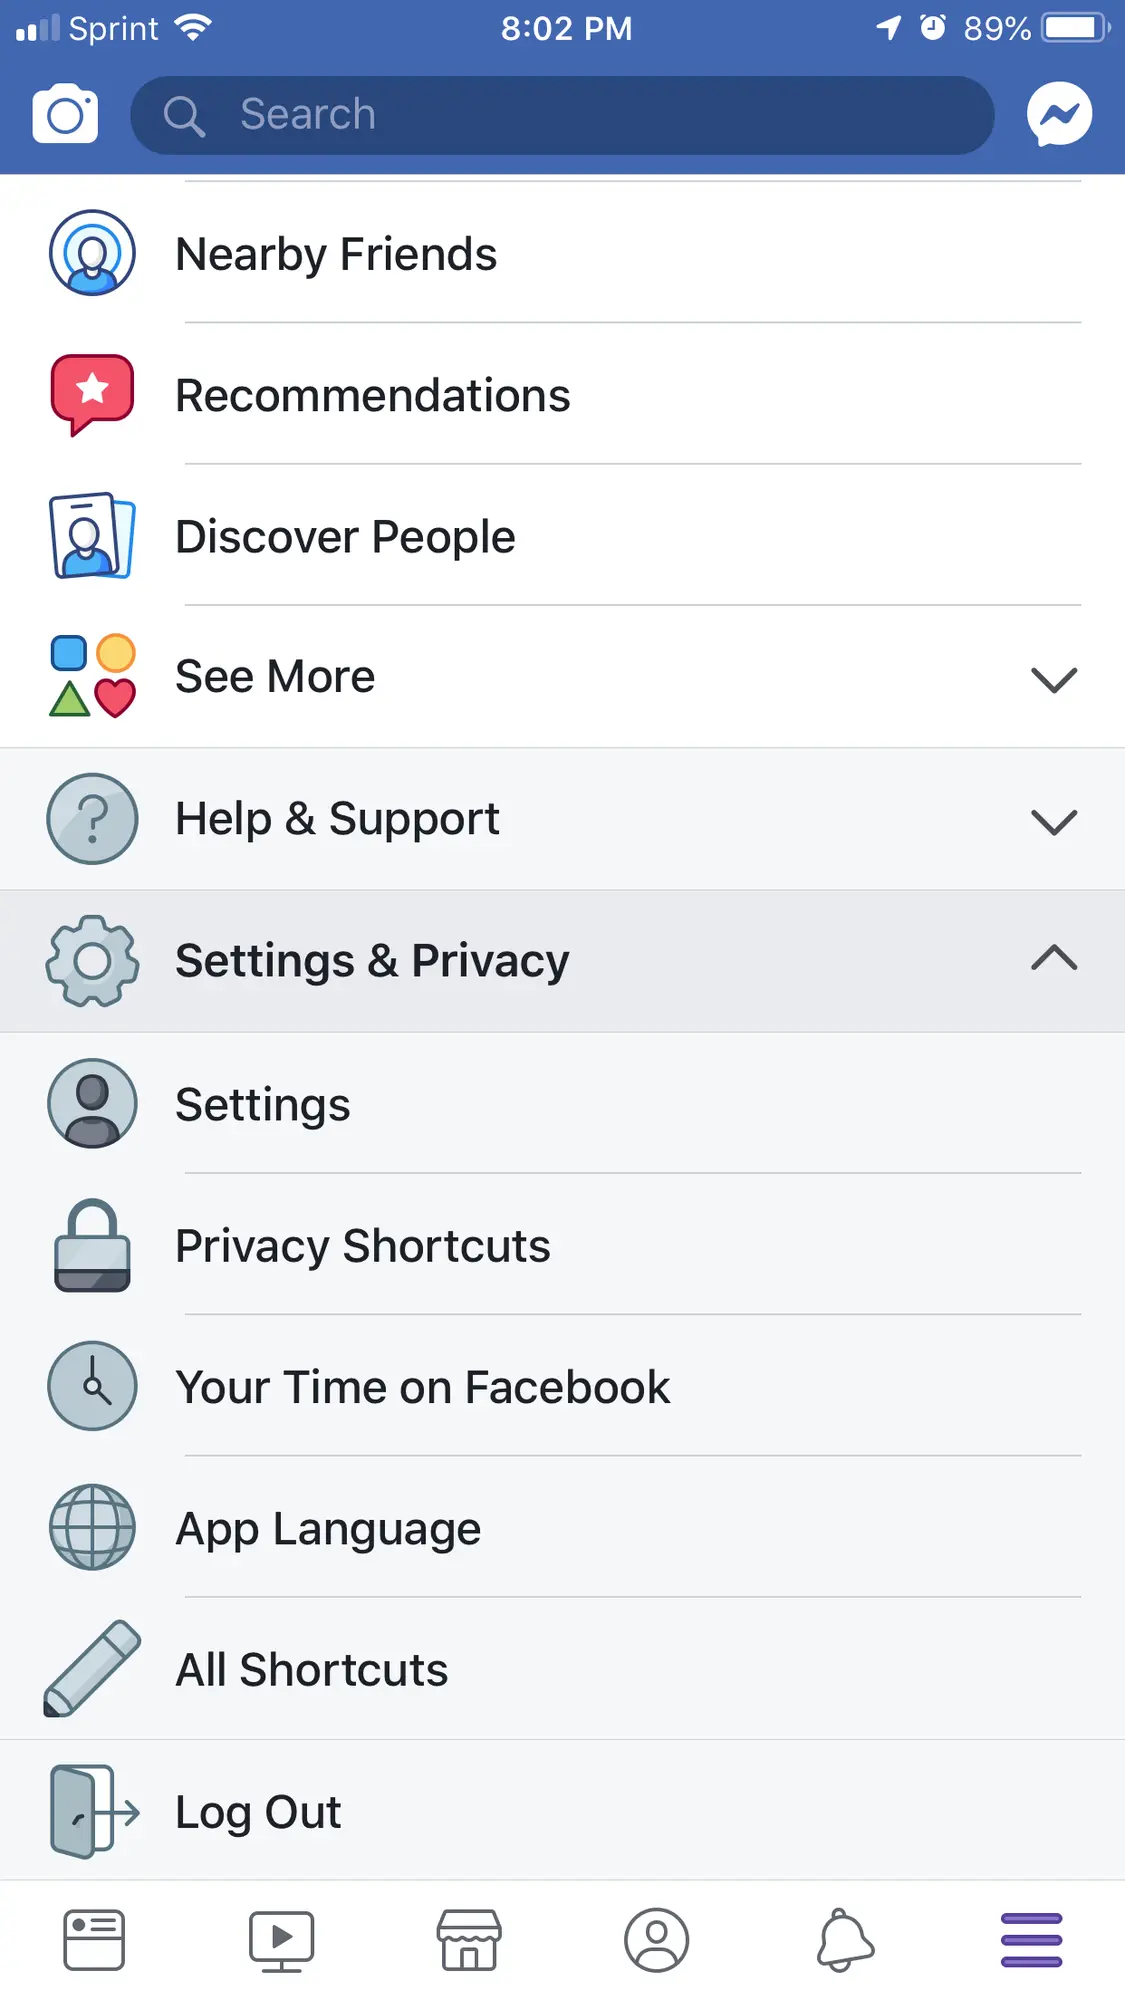
- In your mobile app, tap the three lines in the corner (mine is in the bottom right corner).
- Scroll down to the bottom and tap Settings & privacy, then tap Settings.
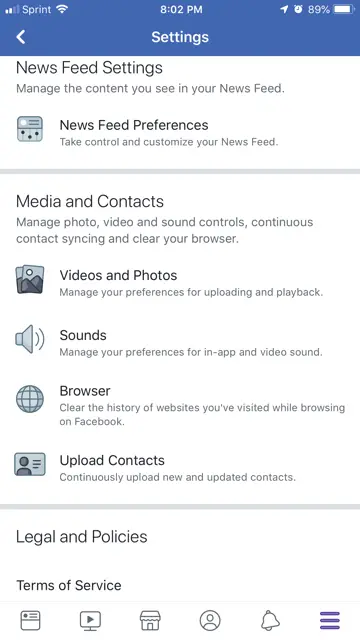
- Scroll down to the bottom of this page until you see Media and contacts. Just below that heading you will see Videos and photos. Tap on that.
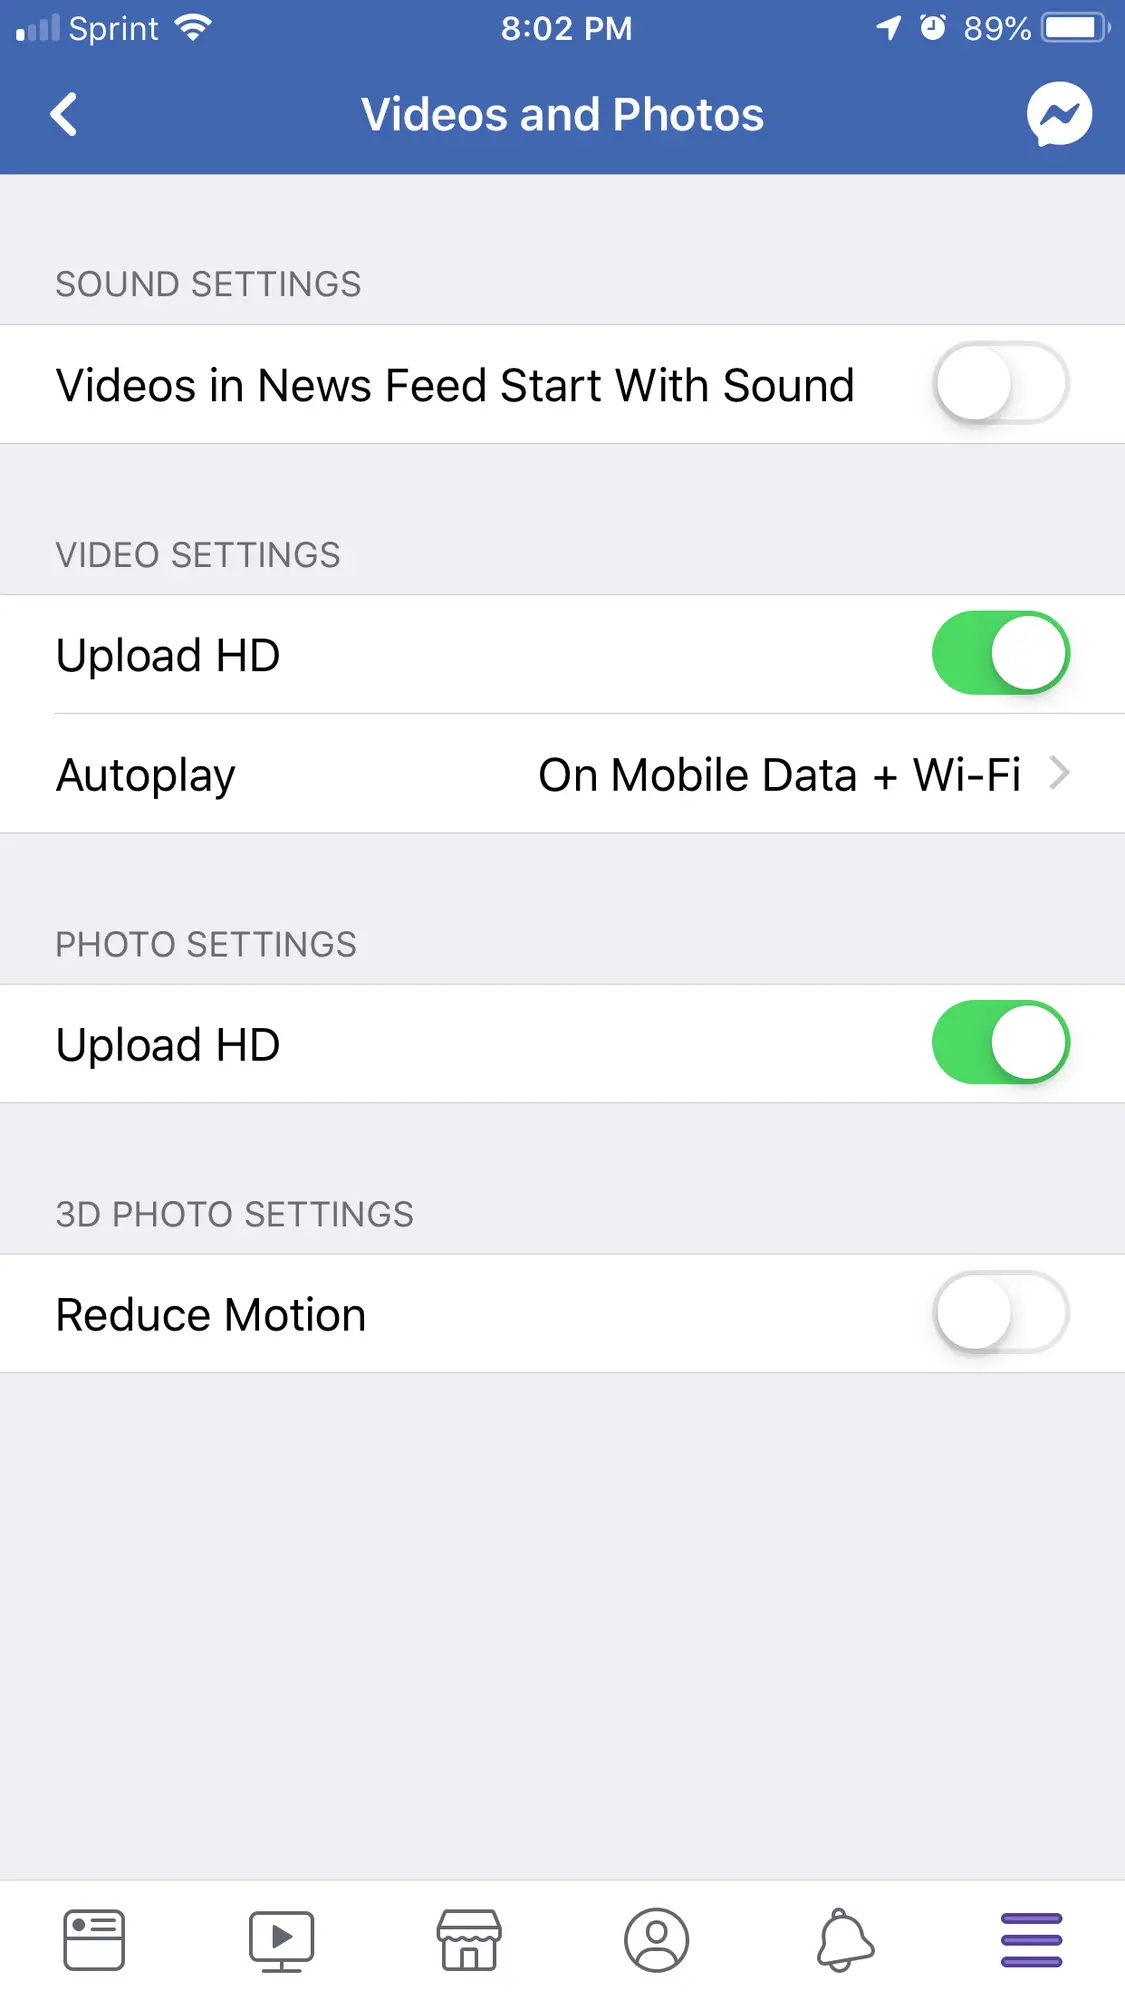
- In the videos and photos menu, turn on the Upload HD switch under photo settings. While you’re here, you may as well turn on HD under video settings too.
- That’s it! You’re done. Just back out of the menus.
Now your photos will upload looking so much better, and all it took was a few minutes to make sure your memories look as great on your page as they do in real life! I hope this helped. Keep a look out for more helpful tips to come!